Valve Lapping; Correction of Valve and Valve Seat; stem and measure the I.D. of the valve guide section.- Page 226
Kubota L3560 Owners Manual
Table of Contents

ENGINE
L3560, L4060, L4760, L5060, L5460, L6060, WSM
1-S79
Correction of Valve and Valve Seat
NOTE
• Before you correct the valve and seat, examine the valve
stem and measure the I.D. of the valve guide section.
Repair them if necessary.
• After you correct the valve seat, be sure to examine the
valve recessing.
1) Correction of valve
1. Correct the valve with a valve refacer.
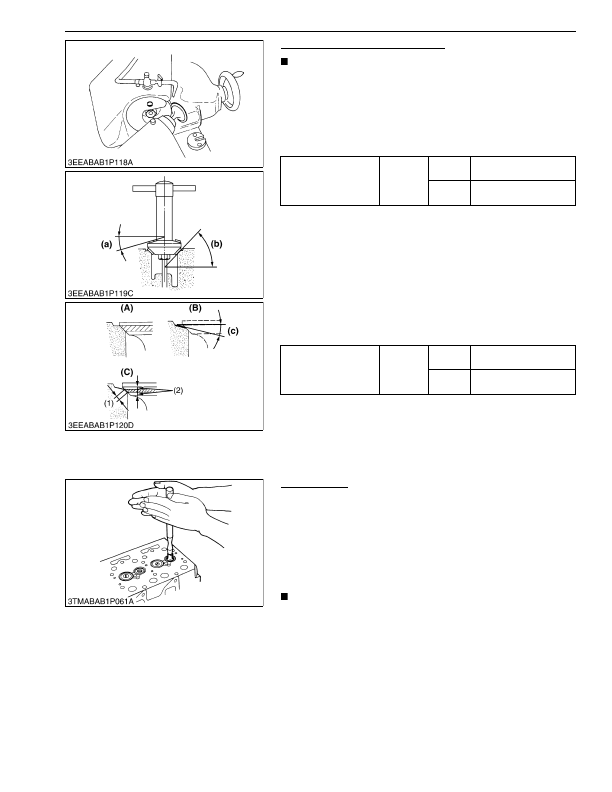
2) Correction of valve seat
1. Slightly correct the seat surface with a 1.0 rad (60 °) or 0.79 rad
(45 °) valve seat cutter.
2. Correct the seat surface with a 0.52 rad (30 °) or 0.26 rad (15 °)
valve seat cutter. The width must be near the specified valve
seat width (2.12 mm, 0.0835 in.).
3. After you correct the seat, examine that the valve seating is flat.
Apply a thin layer of compound between the valve face and
valve seat, and lap them with a valve lapping tool.
4. Examine the valve seating with Prussian Blue. The valve
seating surface must show good contact on all sides.
9Y1210824ENS0075US0
Valve Lapping
1. Apply the compound equally to the valve lapping surface.
2. Put the valve into the valve guide. Lap the valve on its seat with
a valve lapping tool.
3. After you lap the valve, clean away the compound and apply oil,
then lap the valve again with oil.
4. Apply Prussian Blue to the contact surface to measure the
seated rate.
5. If the seated rate is less than 70 %, lap the valve again.
IMPORTANT
• After you complete the valve lapping and assemble the
valve, examine the valve recessing and adjust the valve
clearance.
9Y1210824ENS0076US0
Valve face angle
Factory
specifica-
tion
Intake
0.79 rad
45 °
Exhaust
0.79 rad
45 °
Valve seat angle
Factory
specifica-
tion
Intake
0.79 rad
45 °
Exhaust
0.79 rad
45 °
(1) Valve Seat Width
(2) Identical Dimensions
(A) Examine the Contact
(B) Correct Seat Width
(C) Examine the Contact
(a) 0.26 rad (15 °) or 0.52 rad (30 °)
(b) 0.79 rad (45 °) or 1.0 rad (60 °)
(c) 0.52 rad (30 °) or 0.26 rad (15 °)
KiSC issued 03, 2016 A
Detailed Information for Kubota L3560 Owners Manual
Lists of information found in Kubota L3560 Owners Manual - Page 226
- 1. Correct the valve with a valve refacer.
- 1. Slightly correct the seat surface with a 1.
- 2. Correct the seat surface with a 0.
- 2.12 mm, 0.
- 3. After you correct the seat, examine that the valve seating is flat.
- 4. Examine the valve seating with Prussian Blue.
- 1. Apply the compound equally to the valve lapping surface.
- 2. Put the valve into the valve guide.
- 3. After you lap the valve, clean away the compound and apply oil, then lap the valve again with oil.
- 4. Apply Prussian Blue to the contact surface to measure the seated rate.
- 5. If the seated rate is less than 70 %, lap the valve again.
- 1.0 rad (60 °) (c) 0.
- Before you correct the valve and seat, examine the valve stem and measure the I.
- After you correct the valve seat, be sure to examine the valve recessing.
- After you complete the valve lapping and assemble the valve, examine the valve recessing and adjust the valve clearance.
